Sunday, April 5, 2009

Monster.

I must say, my recent illness couldn't have come at a worse time. Palm Springs sounded so attractive, as did the desert, two places I would have loved to visit. Hopefully another time. As both of you know, around the Murphy homestead, we've been trying to eat healthier. Surprisingly, we've been really successful, which I'm glad of. In spite of all this healthiness, I've begun missing cookies-especially chocolate chippies. So, I've devised this lovely recipe which combines whole-grains and dark chocolate, which are both South Beach friendly, although I suspect these cookies aren't on the doctor's phase two foods to enjoy list. Enjoy them with a cold glass of unsweetened plain soymilk (Whole Foods is my fave) or gasp...dairy milk. I love them and so does my love. I know you will too.

Whole-Grain Oatmeal Chocolate Chippies

(this makes a ton of cookies, I usually halve or quarter the recipe)

1 cup unsalted butter, softened
1 cup raw (unbleached) sugar
.5 cup brown sugar
2 brown eggs (brown are the only kind Matty buy)
1.5 cup of whole-wheat flour (it does make lovely cookies-try it!)
1 tsp baking soda
1 tsp salt
1-2 tsp of vanilla (I honestly usually just dump some in-it's probably closer to 3-4 tsp)
2.25 cups of old-fashioned oats
1 cup of bittersweet chocolate (I use the Ghirardelli 60% cacao)
1 bar of chocolate (of your choosing), chopped
1 cup of peanut butter chips (I use the Reeses ones)
1 small bag of dark chocolate M & Ms (if you're feeling frisky)

Preheat your oven to 350. Cream the butter (or shortening, as Biggie often prefers for baking) and sugar in your KitchenAid (speed 2, then 4), add vanilla. Combine all of the dry ingredients (excluding the oats & candies) and add to the mixture in your KitchenAid (2 then 4). Slowly add the oats to the mixture. Let that work for about a minute until you have a thick doughy deliciousness. Remove the bowl. Using a silicone spatula, add the candies, except for the M & M's.

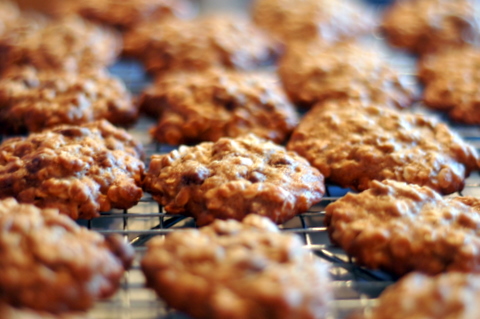
Using your ice cream scoop, scoop up about half a scoop of dough and place on your vegetarian-parchment-lined cookie sheet. Bake in the oven for 6-7 minutes based on your preference. Remove from the oven, let sit on sheet for about a minute then remove to cooling rack at this step, add the M & Ms. After they've cooled, store in a well-sealed container.

Enjoy!

Monday, January 26, 2009

Drink.


Loving hot cocoa the way that I do (It's true, I do!), I decided to whip up a cup on my own the other night. It's a guaranteed decadent warm-up. The best part about this is that it's low-fat/can be low-cal, it's your call. When J.Crew has 30% off its sale and I have a cup of this, what else can I be but happy? Just close your eyes, drink this and imagine that J.Crew opened up their factory for you (Charlie & the Chocolate Factory style) and you could haul off anything & everything you want....ahhhh, one can dream.


Decadence


1 Cup unsweetened Soymilk/Fat-Free Dairy or Water (you can also use half SM/Water if you're slimming)
1 tbsp Dark (or Regular) Cocoa Powder
1 tsp Dark (or Regular) Cocoa Powder
2 tbsp Sugar (or Splenda)
1 tsp Sugar (or Splenda)
1/2 tsp Vanilla

In a medium saucepan, heat up the liquids until steaming a little (don't scald it-no boiling). Add the Cocoa-use a whisk to incorporate it fully. Add the sweetener and incorporate it, as well. Allow to heat to desired temperature. Makes enough for two tastes-one for you and one for your honey. Remember-hot cocoa should be drunk in small portions-you want just a taste, not to be a glutton!

Serve plain, with cream or a marshmallow.

Enjoy!

________Dark, Dirty Section-for Adults, only_______

This is filthy dirty, but it is my FAVORITE hot chocolate. It's Parisian Hot Chocolate and it is the only time I consume marshmallows. I don't know the nutrition info on this baby, and to be frank, I don't want to. I will, however, share this delight of the gods...you want Ambrosia? You got it...

This makes enough for a party (or for brunch)-think like 10-14

1 Cup baking chocolate (not chips, but the other ones-they're little circles)
1 Cup cocoa powder
1 Cup unbleached sugar
2 quarts of heavy cream (I told you it is filthy)

Over low heat, combine the cream and sugar. Remove from heat and then whisk the chocolate and cocoa together until fully delightful looking.

Uggghh, it's soo gross, but so good.

As promised, I love this with marshmallows...here's how to make these little darlins'.

Marshmallows!

1 cup cold water, divided

3 - 1/4 ounce envelopes unflavored gelatin (they sell vegetarian gelatin, too!)

2 cups granulated unbleached sugar

1 cup light corn syrup

1/4 teaspoon salt

2 teaspoons pure vanilla extract

Lightly spray the bottom of a 13x9x2-inch baking pan. Line the bottom of the pan with parchment paper. Then sift about 3 tablespoons of confectioners' sugar onto the parchment.

Place 1/2 cup cold water into the bowl of your KitchenAid with the whisk attachment. Sprinkle the gelatin over the water and let stand about 15 minutes.

Meanwhile, in a two quart saucepan combine the sugar, corn syrup, salt, and remaining 1/2 cup cold water. Stir over medium heat until sugar dissolves and the mixture comes to a boil. Cover with a lid and let boil for about three minutes to allow any sugar crystals to dissolve from the sides. Remove the lid and attach a candy thermometer to the side of the pan. Increase heat to high and boil, without stirring, until the syrup reaches 240 degrees, about 10 minutes. Remove from heat.

With mixer running at low speed, slowly pour the hot syrup into the gelatin mixture in a thin stream down the side of the bowl. Gradually increase the speed to high and beat until mixture has tripled in volume and is very thick and stiff, about 10 minutes (looks like thick creme of marshmallow). Add vanilla extract and beat to combine, about 30 seconds longer.

Scrape marshmallow mixture into the prepared pan and spread with a damp offset spatula or rubber spatula. The mixture is very sticky so just smooth it out as best as you can. Dust the top of the marshmallow with another 3 tablespoons of confectioners' sugar and let stand, uncovered, at room temperature until set, about 12 hours.

Remove the marshmallow from the pan by first running a small sharp knife around the edge of the marshmallow to loosen it from the pan. Invert the pan onto a large cutting board that has been dusted with confectioners' sugar. You might have to use your fingers to help loosen the marshmallow from the pan. Peel off the parchment paper (the marshmallow will be sticky) and dust the top of the marshmallow with confectioners' sugar. Cut the marshmallow into squares using a pizza roller or sharp knife. Dip the cut sides of the marshmallows in additional confectioners' sugar. Shake off excess sugar and store the marshmallows in an airtight container, at room temperature, for up to two weeks.

Makes about 24 - 2 1/2 inch marshmallows.

Sunday, January 11, 2009

Nuts.

I'm heading into super cold weather time (even in the lower Mid-Atlantic region), clearly my much-loved sisters are not (well, maybe Jodi), so what better to eat than a warm Sunday lunch sensation? Enter, the Nut Roast. After a great deal worrying that we had lost it, here is the recipe for the beloved Angela/Irish Nut Roast. Many attempt, but none can imitate its hearty, yet delicate flavor.

I've posted the imperial measurements, not metric. If you want metric (also a band, which I love), let me know.

Enjoy!


Nut Roast

2 oz of Butter
1 Onion (or Spring Onions)
2 stalks of Celery
2 cloves of Garlic
Grated zest & juice of 1 lemon
1 TBSP fresh Thyme
8 oz of Mixed Nuts (toasted & finely chopped-use your chopper.)
8 oz Brown Rice (cooked & cooled)
4 0z graded Cheddar Cheese (use the sharp kind, since it's tastier)
2 TBSP mixed fresh Herbs
2 Eggs, lightly beaten

Onion Gravy

2 oz Butter
2 lb Onions, peeled & chopped (or Spring Onions, again-if you're lame)
1 clove of Garlic (peeled & crushed)
1 TBSP chopped fresh Thyme
pinch of unbleached sugar
4 oz of Ruby Port
1 pint of low-sodium vegetable stock

Nut Roast Instructions

Melt butter in pan, add the onion, celery, garlic, lemon zest and thyme and cook until softened and transparent (about 10 minutes). Transfer this mixture into food processor and add all of the remaining ingredients. Pulse until everything is blended, then season liberally. Spoon the well-mixed & seasoned mixture into a loaf pan (about 2lb)- spray the inside AND use parchment on the bottom. Smooth over the top of the mixture and cover with more parchment, then cover with a layer of foil. Bake at 375 (190C) for 1 hour, 15 minutes, until a skewer goes in the center and comes out hott (like me).

Onion Gravy Instructions

Melt butter in a saucepan, add the garlic, onions, thyme, sugar and salt. Cook on low temperature for ~20 minutes until golden, slightly caramelized and delicious-stir and scrape bottom intermittently. Add the port and reduce by half, then stir in the stock and and simmer covered for 15 minutes. Strain into another pan, pressing through as much of the solids as possible, then keep warm.

Finishing Instructions

Leave the Nut Roast to stand in the pan for 10 minutes, then remove to a warmed plate. Serve cut in slices, with the onion gravy and roasted seasonal vegetables.

It makes me hungry just to read this-comment back with any changes or ideas you come up with.